


How to Design a Custom Wristband Without a Graphic Designer
Most people ordering custom wristbands for the first time assume they need a graphic designer to get a professional result. In reality, the majority of wristband designs are simple text-and-color combinations that anyone can put together in a few minutes. Online design tools handle the layout, font rendering, and print preview automatically, so all you need is a clear idea of what you want the band to say and look like.
Knowing how to design a wristband without a designer comes down to making a few smart decisions about message, material, color, and text placement. Here is a straightforward walkthrough of the process, along with practical tips to help you get a polished result on the first try.
Why You Don't Need a Graphic Designer for Wristbands
The assumption that custom products require professional design work makes sense for business cards, packaging, or website graphics. Wristbands are different. The design surface is narrow, the format is standardized, and the customization options are built into the ordering tool itself. Most people are surprised by how little design work is actually involved.
Online Design Tools Do the Heavy Lifting
Suppliers like Wristband Express offer online configurators that walk you through the design process step by step. You choose a band color, type your text, select a font, and optionally add a graphic from a built-in clipart library or upload your own logo file. The tool generates a real-time preview of what the finished wristband will look like, so you can adjust spacing, sizing, and positioning before placing the order. No design software, no file exports, and no back-and-forth with a freelancer.
Most Wristband Designs Are Simpler Than You Think
A standard wristband has room for one or two lines of text and, optionally, a small graphic or logo. That is the full design. The bands that look the most professional are usually the simplest: one bold message, one or two colors, and clean font choices. Overcomplicating the layout with too many elements, fonts, or competing colors is the most common mistake beginners make, and it is the easiest to avoid.
Step-by-Step: How to Create a Wristband Design Yourself
Understanding how to create a wristband design yourself is mostly about making four decisions in the right order. The steps below apply to any material, from custom silicone wristbands for awareness campaigns to custom Tyvek® bands for event admission.
1. Start With Your Purpose and Message
Before choosing colors or fonts, write down the purpose of the wristband and the exact message you want printed on it. A fundraiser wristband carrying an awareness slogan needs a different approach than an event admission band carrying a date and venue name. The purpose shapes every decision that follows.
Keep the message short. Most wristbands fit 20 to 35 characters per line, depending on the material and band width. A strong wristband message is something people can read at a glance, like "Run For Hope 2026" or "VIP Access." If the text requires squinting, editing it down will improve the result more than any font or color change.
2. Pick the Right Material for Your Event
Material selection affects both the design options available and the final look of the wristband. Each material supports different customization methods, so choosing the material before designing saves time and avoids rework.
Here is a quick guide to matching materials to common use cases:
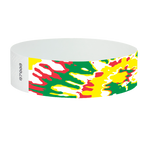
- Tyvek® wristbands support custom printed text, graphics, barcodes, and serial numbering. Best for single-day events where cost matters most.
- Silicone wristbands offer debossed, embossed, printed, and ink-injected customization. Best for awareness campaigns, fundraisers, and keepsakes.
- Plastic and vinyl wristbands support printed text and color options. Best for multi-day events requiring waterproof, tamper-proof security.
- Cloth wristbands allow full-color woven or sublimated designs. Best for festivals and premium events where the band doubles as a collectible.
3. Choose Colors That Work Together
Color is the single biggest factor in how professional a wristband looks. A well-chosen two-color combination, such as white text on a dark blue band or black text on a bright yellow band, creates a clean, readable design without any graphic design knowledge.
A few reliable color principles for beginners:
- High contrast between the band color and the text color makes the message readable from a distance
- Matching the wristband color to a brand, school, cause, or event theme adds instant coherence
- Sticking to one or two colors keeps the design clean. Three or more colors on a narrow band can look crowded
- Swirled or segmented silicone bands combine two colors in the band itself, adding visual interest without touching the text design
4. Add Text, Graphics, and Finishing Touches
Once the material and colors are set, the design tool lets you type your message, choose a font, and adjust the text size and placement. For most wristbands, a single bold, sans-serif font in a readable size is all you need. Script fonts and decorative typefaces can be hard to read on a narrow band, especially in smaller sizes.
If you want to add a graphic, built-in clipart libraries include commonly used icons like hearts, ribbons, stars, paw prints, awareness symbols, and sports graphics. You can also upload a logo file if your organization has one. Place the graphic at one end of the band or centered between text lines, and leave enough space so the text and graphic do not overlap or feel cramped.
For event wristbands that need added functionality, most configurators also let you add serial numbering, barcodes, or QR codes during the design process, all without requiring external design software.
DIY Wristband Design Tips That Make a Real Difference
Even without formal design training, a handful of practical choices can separate a polished wristband from one that looks like an afterthought. Keeping a few DIY wristband design tips in mind during the process helps you avoid the most common pitfalls.
Keep the Text Short and the Layout Simple
The most effective wristband designs use fewer words, not more. One strong phrase or event name with a date is almost always more readable and more visually appealing than a full sentence crammed onto a narrow band. If you need to include additional information like a website URL or phone number, use the inside-band printing option available on most silicone wristbands so the exterior stays clean.
Wristband Design Ideas for Beginners
If you are starting from scratch and need inspiration, here are proven wristband design ideas for beginners that work across materials and event types:
- Event name plus date on the front, organization logo on one end (clean and professional for conferences and school events)
- Cause slogan in bold text with an awareness ribbon graphic (effective for fundraisers and charity walks)
- Team name in school colors using debossed or embossed silicone (great for sports teams, spirit weeks, and club identifiers)
- "VIP" or "All Access" text on a contrasting color band (simple and immediately functional for tiered event access)
- A short memorial message with a name and date (personal and meaningful for tribute events)
For anyone learning how to make wristbands without design experience, starting with one of these proven templates and adjusting the details to fit your event is the fastest path to a professional result.
Start Designing Your Custom Wristband Today
You do not need a graphic designer, design software, or a creative background to build a custom wristband that looks professional. Wristband Express offers a free online design tool that walks you through material selection, color choices, text entry, and graphic placement in minutes. With over 25 years of experience and same-day shipping on stock orders placed before 3 PM CST, getting a custom wristband from idea to doorstep is simpler than most people expect.
Frequently Asked Questions
1. Do I need design software to create a custom wristband?
No. Most wristband suppliers offer free online configurators that handle text, color, graphics, and layout directly in the browser. No downloads or design software are required.
2. What file format do I need if I want to upload a logo?
PNG, JPG, and SVG files are the most commonly accepted formats. A high-resolution PNG with a transparent background typically produces the cleanest result on a wristband.
3. How many words can fit on a wristband?
Most wristbands fit 20 to 35 characters per line, depending on the material and width. Shorter messages in larger fonts are easier to read and look more professional than long text in small print.
4. Can I preview my wristband design before ordering?
Yes. Online design tools generate a real-time visual preview as you build your design. You can adjust text, colors, sizing, and graphic placement before finalizing the order.
5. What is the easiest wristband material to customize?
Tyvek wristbands are the easiest and fastest to customize, with one-business-day production on custom orders. Silicone wristbands offer the widest range of customization styles, including debossed, embossed, printed, and ink-injected options.
6. Can I order just a small quantity of custom wristbands?
Yes. Many suppliers have no minimum order requirement for custom wristbands, making it possible to order small batches for personal events, small teams, or test runs before committing to a larger order.
Share